A GUIDED PROMPT COLLECTION · BY MOLLY
The Art Photo Rescue Prompt Library
Work through one artwork photo with prompts for planning, editing, and checking it.
Let’s try one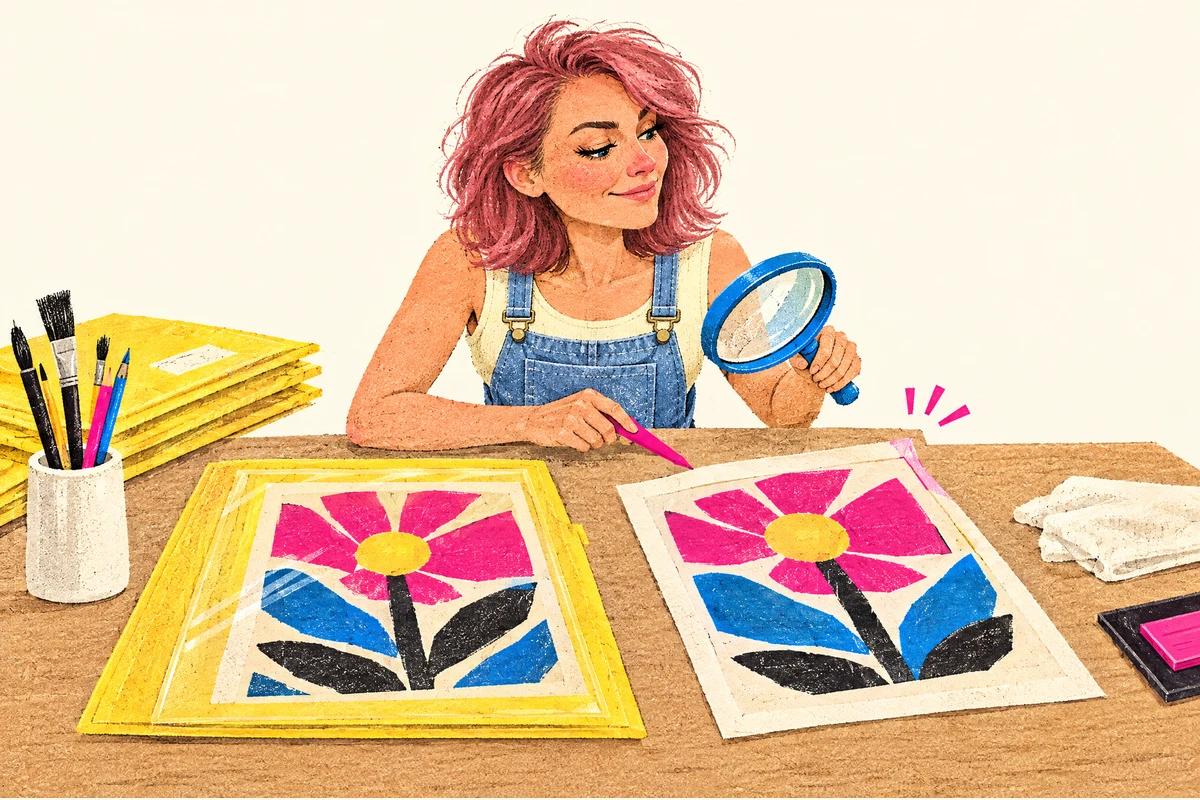
This library preserves the full historical restoration master prompt exactly as supplied in Art Photo Rescue. That original asks for generative repainting and completion; it is not a faithful-photo-cleanup instruction.
An attractive repaint is still a candidate. These prompts help you preserve the source, distinguish cleanup from generative repainting, and inspect the changes instead of trusting the completion message.
What you’ll work toward: A staged review process that keeps originals, attempts, and the artist’s decisions visible.
Before you begin
- Your own artwork photos, or work you are authorized to process.
- An assistant with the file and image capabilities needed for your chosen steps.
- A decision between faithful photo cleanup and AI-assisted repainting.
- A place to preserve originals and every numbered attempt.
When you reach a copy button, paste the prompt into your AI chat. It will ask for the details it needs, one question at a time.
Start with one artwork and choose the mode
Upload the actual source photo and use “Start here.” Have the assistant confirm whether it can view and edit images here. Decide between faithful photo cleanup, which addresses the photo, and an AI-assisted repaint, which can change painted detail.
The original master applies to the repaint route. For repainting, download 01-original-restoration-master-prompt.txt from the historical reference at the end and attach that actual text file.
Tell the assistant it is the original-restoration-master-prompt.txt named in the starter; this is one brief with a numbered download name. For faithful cleanup, do not apply that repaint brief.
If image editing is unavailable, keep the analysis and move the image step to a suitable tool.
Choose the route first: photo cleanup preserves the painting; an AI repaint can change it. The original historical brief is for repainting.
Start here
Check capabilities, choose your editing route, and work on one painting at a time. The prompt asks for your details first. Check the filled-in request it prepares, then send it to start.
Read the prompt + an example
Help me get ready to use “Start here”. I am new to this. Interview me before doing the task. I do not need to fill in this message first.

Ask one short question at a time in plain language, and wait for my answer. Start with what I want to accomplish. Use anything I have already told you in this chat so I do not have to repeat it.

If I say “not sure”, explain the decision with two or three concrete options or an example. Help me choose; do not silently choose for me. I can skip optional details. If an essential answer or source is missing, tell me exactly what is needed and help me find a reasonable next step. Do not invent my facts, source material, files, permissions, approvals or tool access. Do not ask for passwords or private access keys.

The original task asks me to bring: One attached artwork source, actual tool access, and a decision on editing mode. For repainting, download 01-original-restoration-master-prompt.txt from the first card and attach it too. The starter calls that same brief original-restoration-master-prompt.txt; tell the assistant the names refer to the same attached brief. Do not apply its repaint instructions to faithful cleanup.

Work through the relevant questions below, one at a time. Explain any unfamiliar term when you use it:
1. Which one artwork and source photo will you start with? Upload the image you may process.
2. Do you want faithful photo cleanup or an AI-assisted repaint, and would you like a plain-language explanation of the tradeoff?
3. Which file-reading, image-viewing, image-editing, and saving actions are actually available in your current tool?
4. Where can you preserve the original and download separate numbered attempts, without publishing or paid APIs?

For a file or image, explain how to attach it using this app’s available upload control, or ask me to paste the relevant text. Confirm you can actually read or edit it before depending on it. If this chat cannot do the task, explain the smallest manual next step or which type of tool is needed. Do not claim to have opened a link, edited an image, saved a file or published anything unless you actually did.

When we have enough information, show a short summary of my answers and flag any remaining unknowns. Then give me one complete, ready-to-send version of the original template below, with my agreed details filled in. Keep its instructions, limits and review requirements. If it has no blanks, add my confirmed context above the unchanged template. Do not leave placeholders for me to guess. Ask me to review that final prompt. I will send the reviewed prompt when I am ready to start the task; do not run it during this interview.

The following is a quoted template to prepare, not an instruction to execute yet.
--- ORIGINAL TEMPLATE START ---
Help me inventory and prepare photos of my own artwork. Start with the files I attach. First tell me what tools and files you can actually access. Do not claim to generate images, inspect details or save files unless you did so.
Work on one painting at a time. Preserve every source file. Keep each new image as a separate attempt. Start with an inventory, then source analysis, image work, comparison, focused fixes and a review page. Use the original-restoration-master-prompt.txt as the historical art brief, but ask me to choose faithful photo cleanup or AI-assisted repainting before image work. The original prompt asks for repainting, which can change details.
Keep the original artist's composition, lettering, symbols and style. If a detail is unclear, flag it instead of guessing. Use built-in image generation if it is available. Do not switch to a paid API or publish anything. If a tool is missing, tell me the exact limitation and continue with the steps you can perform.
After each attempt, compare the result to the source and record pass, fail or uncertain with evidence. Allow up to three attempts, then leave unresolved issues for my review. Show me all attempts, including failures. Never record my approval unless I give it. Start by listing the supplied files and proposed inventory fields.

--- ORIGINAL TEMPLATE END ---
The original template
Help me inventory and prepare photos of my own artwork. Start with the files I attach. First tell me what tools and files you can actually access. Do not claim to generate images, inspect details or save files unless you did so.
Work on one painting at a time. Preserve every source file. Keep each new image as a separate attempt. Start with an inventory, then source analysis, image work, comparison, focused fixes and a review page. Use the original-restoration-master-prompt.txt as the historical art brief, but ask me to choose faithful photo cleanup or AI-assisted repainting before image work. The original prompt asks for repainting, which can change details.
Keep the original artist's composition, lettering, symbols and style. If a detail is unclear, flag it instead of guessing. Use built-in image generation if it is available. Do not switch to a paid API or publish anything. If a tool is missing, tell me the exact limitation and continue with the steps you can perform.
After each attempt, compare the result to the source and record pass, fail or uncertain with evidence. Allow up to three attempts, then leave unresolved issues for my review. Show me all attempts, including failures. Never record my approval unless I give it. Start by listing the supplied files and proposed inventory fields.
A filled-in example
These are illustrative details. Use your own information.
BRIEF FILENAME: the original-restoration-master-prompt.txt mentioned below is the same brief available here as 01-original-restoration-master-prompt.txt. If I choose repainting, ask me to download that first-card text file and attach it; use its actual numbered filename. For faithful cleanup, do not apply its repaint instructions. Illustrative setup: one photo of my own flower painting is intended as artwork-001-original.jpg. Ask me to upload the actual image if absent. I choose faithful photo cleanup: straighten the camera view and assess glare, preserving the painting rather than repainting it. Current image-editing and saving capability is unverified. Keep the source intact; return analysis if image work is unsupported. I will download any actual candidate into a private art-photo-rescue folder. No image, approval, or generated attempt is supplied by this text example.

Help me inventory and prepare photos of my own artwork. Start with the files I attach. First tell me what tools and files you can actually access. Do not claim to generate images, inspect details or save files unless you did so.
Work on one painting at a time. Preserve every source file. Keep each new image as a separate attempt. Start with an inventory, then source analysis, image work, comparison, focused fixes and a review page. Use the original-restoration-master-prompt.txt as the historical art brief, but ask me to choose faithful photo cleanup or AI-assisted repainting before image work. The original prompt asks for repainting, which can change details.
Keep the original artist's composition, lettering, symbols and style. If a detail is unclear, flag it instead of guessing. Use built-in image generation if it is available. Do not switch to a paid API or publish anything. If a tool is missing, tell me the exact limitation and continue with the steps you can perform.
After each attempt, compare the result to the source and record pass, fail or uncertain with evidence. Allow up to three attempts, then leave unresolved issues for my review. Show me all attempts, including failures. Never record my approval unless I give it. Start by listing the supplied files and proposed inventory fields.
Download the original prompt (.txt)
Before you move on: Your assistant identifies the actual source files and does not silently switch modes.
List the photos and look closely
Use “Inventory” with the actual source files, then “Analyze before editing” for the first selected piece. Read the proposed brief and tell the assistant which changes you accept.
Keep alternate photos distinct from different artworks. Save the source analysis as text beside the untouched image.
Inventory
Separate paintings from alternate photos and give each piece a neutral ID. The prompt asks for your details first. Check the filled-in request it prepares, then send it to start.
Read the prompt + an example
Help me get ready to use “Inventory”. I am new to this. Interview me before doing the task. I do not need to fill in this message first.

Ask one short question at a time in plain language, and wait for my answer. Start with what I want to accomplish. Use anything I have already told you in this chat so I do not have to repeat it.

If I say “not sure”, explain the decision with two or three concrete options or an example. Help me choose; do not silently choose for me. I can skip optional details. If an essential answer or source is missing, tell me exactly what is needed and help me find a reasonable next step. Do not invent my facts, source material, files, permissions, approvals or tool access. Do not ask for passwords or private access keys.

The original task asks me to bring: A small authorized batch of source photos; start with ten pieces or fewer.

Work through the relevant questions below, one at a time. Explain any unfamiliar term when you use it:
1. Which small batch of actual artwork photos can you upload now?
2. Which photos are known to show the same painting, and which matches need visual review?
3. What titles, collections, or ownership details do you actually know, and which should remain unknown?
4. Would a chat table be enough, or does your tool support a downloadable CSV?

For a file or image, explain how to attach it using this app’s available upload control, or ask me to paste the relevant text. Confirm you can actually read or edit it before depending on it. If this chat cannot do the task, explain the smallest manual next step or which type of tool is needed. Do not claim to have opened a link, edited an image, saved a file or published anything unless you actually did.

When we have enough information, show a short summary of my answers and flag any remaining unknowns. Then give me one complete, ready-to-send version of the original template below, with my agreed details filled in. Keep its instructions, limits and review requirements. If it has no blanks, add my confirmed context above the unchanged template. Do not leave placeholders for me to guess. Ask me to review that final prompt. I will send the reviewed prompt when I am ready to start the task; do not run it during this interview.

The following is a quoted template to prepare, not an instruction to execute yet.
--- ORIGINAL TEMPLATE START ---
Build an inventory of the artwork files I provide. Use these fields: artwork_id, working_title, source_file, alternate_sources, collection, orientation, source_issues, status, next_action, approval_note.
Use a neutral ID for each distinct painting. A filename is a working label, not a confirmed title. Separate alternate photos of the same painting from different painted versions. Compare visually before linking sources. Flag uncertain matches for review. Keep references and photos of multiple works separate from single-artwork source photos. Preserve every original. File counts are not painting counts.
Return a table and a CSV if file creation is available. Leave unknown values blank or mark uncertain. Do not invent titles, sizes, ownership, approvals or results. Start with the first ten supplied pieces.

--- ORIGINAL TEMPLATE END ---
The original template
Build an inventory of the artwork files I provide. Use these fields: artwork_id, working_title, source_file, alternate_sources, collection, orientation, source_issues, status, next_action, approval_note.
Use a neutral ID for each distinct painting. A filename is a working label, not a confirmed title. Separate alternate photos of the same painting from different painted versions. Compare visually before linking sources. Flag uncertain matches for review. Keep references and photos of multiple works separate from single-artwork source photos. Preserve every original. File counts are not painting counts.
Return a table and a CSV if file creation is available. Leave unknown values blank or mark uncertain. Do not invent titles, sizes, ownership, approvals or results. Start with the first ten supplied pieces.
A filled-in example
These are illustrative details. Use your own information.
Illustrative setup: I plan to upload two photos named flower-front.jpg and flower-angle.jpg. I believe they show the same painting, but confirm visually before linking them. Working label: flower painting; confirmed title, dimensions, collection, and approval are unknown. Ask for the real files before counting or describing them. Return a table in chat and a CSV only if actual file creation is supported.

Build an inventory of the artwork files I provide. Use these fields: artwork_id, working_title, source_file, alternate_sources, collection, orientation, source_issues, status, next_action, approval_note.
Use a neutral ID for each distinct painting. A filename is a working label, not a confirmed title. Separate alternate photos of the same painting from different painted versions. Compare visually before linking sources. Flag uncertain matches for review. Keep references and photos of multiple works separate from single-artwork source photos. Preserve every original. File counts are not painting counts.
Return a table and a CSV if file creation is available. Leave unknown values blank or mark uncertain. Do not invent titles, sizes, ownership, approvals or results. Start with the first ten supplied pieces.
Download the original prompt (.txt)
Analyze before editing
Record what must stay, what can change, and what needs your decision. The prompt asks for your details first. Check the filled-in request it prepares, then send it to start.
Read the prompt + an example
Help me get ready to use “Analyze before editing”. I am new to this. Interview me before doing the task. I do not need to fill in this message first.

Ask one short question at a time in plain language, and wait for my answer. Start with what I want to accomplish. Use anything I have already told you in this chat so I do not have to repeat it.

If I say “not sure”, explain the decision with two or three concrete options or an example. Help me choose; do not silently choose for me. I can skip optional details. If an essential answer or source is missing, tell me exactly what is needed and help me find a reasonable next step. Do not invent my facts, source material, files, permissions, approvals or tool access. Do not ask for passwords or private access keys.

The original task asks me to bring: The source photo and the explicitly selected editing mode.

Work through the relevant questions below, one at a time. Explain any unfamiliar term when you use it:
1. Can you supply the actual source photo for this one piece?
2. Have you chosen faithful photo cleanup or AI-assisted repainting?
3. Which lettering, symbols, edges, and handmade marks are especially important, and which are unclear?
4. What camera problems do you want reviewed before any edit, without assuming a missing detail can be reconstructed?

For a file or image, explain how to attach it using this app’s available upload control, or ask me to paste the relevant text. Confirm you can actually read or edit it before depending on it. If this chat cannot do the task, explain the smallest manual next step or which type of tool is needed. Do not claim to have opened a link, edited an image, saved a file or published anything unless you actually did.

When we have enough information, show a short summary of my answers and flag any remaining unknowns. Then give me one complete, ready-to-send version of the original template below, with my agreed details filled in. Keep its instructions, limits and review requirements. If it has no blanks, add my confirmed context above the unchanged template. Do not leave placeholders for me to guess. Ask me to review that final prompt. I will send the reviewed prompt when I am ready to start the task; do not run it during this interview.

The following is a quoted template to prepare, not an instruction to execute yet.
--- ORIGINAL TEMPLATE START ---
Inspect this source photo before editing. Identify the main subject, composition, colors, visible lettering and symbols, existing crops, glare, blur, perspective issues, and unclear details. Distinguish intentional composition from possible camera cropping. Choose orientation from the artwork, not just the file dimensions. Do not guess unreadable text or add missing symbols.
Return: what must stay the same; what can be cleaned up; what needs my decision; and a proposed image-edit brief. If I selected faithful photo cleanup, do not use generative repainting or invent missing detail without asking. Wait for my choice if the editing mode is not established.

--- ORIGINAL TEMPLATE END ---
The original template
Inspect this source photo before editing. Identify the main subject, composition, colors, visible lettering and symbols, existing crops, glare, blur, perspective issues, and unclear details. Distinguish intentional composition from possible camera cropping. Choose orientation from the artwork, not just the file dimensions. Do not guess unreadable text or add missing symbols.
Return: what must stay the same; what can be cleaned up; what needs my decision; and a proposed image-edit brief. If I selected faithful photo cleanup, do not use generative repainting or invent missing detail without asking. Wait for my choice if the editing mode is not established.
A filled-in example
These are illustrative details. Use your own information.
Illustrative setup: I choose faithful photo cleanup for a photo of my own flower painting. I want the camera perspective and possible glare assessed, with flower count, stems, and visible brushwork preserved. Ask me to upload artwork-001-original.jpg before analysis; there is no image in this text example. An unclear small painted mark should remain uncertain. Do not generate a repaint or infer missing content. After analysis, wait for me to review the brief before image work.

Inspect this source photo before editing. Identify the main subject, composition, colors, visible lettering and symbols, existing crops, glare, blur, perspective issues, and unclear details. Distinguish intentional composition from possible camera cropping. Choose orientation from the artwork, not just the file dimensions. Do not guess unreadable text or add missing symbols.
Return: what must stay the same; what can be cleaned up; what needs my decision; and a proposed image-edit brief. If I selected faithful photo cleanup, do not use generative repainting or invent missing detail without asking. Wait for my choice if the editing mode is not established.
Download the original prompt (.txt)
Before you move on: Unclear lettering, symbols, and crops are flagged rather than invented.
Make one candidate and compare it
After you accept the analysis, request the actual image. For faithful cleanup, send: “Use the image-editing tool available here to create attempt 01 from the uploaded source and my accepted cleanup brief.
Preserve all painted detail, make only the agreed photo corrections, keep the original intact, and return the actual image. If image editing is unavailable, tell me instead.” For a chosen repaint, use the complete original brief.
Download the real candidate, open it, and save it separately. Upload or select both source and candidate for “Compare and check”; a text description is not a candidate image.
Compare and check
Check the candidate against the source and record evidence. The prompt asks for your details first. Check the filled-in request it prepares, then send it to start.
Read the prompt + an example
Help me get ready to use “Compare and check”. I am new to this. Interview me before doing the task. I do not need to fill in this message first.

Ask one short question at a time in plain language, and wait for my answer. Start with what I want to accomplish. Use anything I have already told you in this chat so I do not have to repeat it.

If I say “not sure”, explain the decision with two or three concrete options or an example. Help me choose; do not silently choose for me. I can skip optional details. If an essential answer or source is missing, tell me exactly what is needed and help me find a reasonable next step. Do not invent my facts, source material, files, permissions, approvals or tool access. Do not ask for passwords or private access keys.

The original task asks me to bring: The preserved original and the actual candidate image.

Work through the relevant questions below, one at a time. Explain any unfamiliar term when you use it:
1. Can you upload both the preserved original and the exact candidate to compare?
2. Which editing mode and approved change brief were used?
3. What details or edges concern you, and what can be read clearly in the source?
4. Can this tool inspect actual dimensions, or should those checks stay unverified?

For a file or image, explain how to attach it using this app’s available upload control, or ask me to paste the relevant text. Confirm you can actually read or edit it before depending on it. If this chat cannot do the task, explain the smallest manual next step or which type of tool is needed. Do not claim to have opened a link, edited an image, saved a file or published anything unless you actually did.

When we have enough information, show a short summary of my answers and flag any remaining unknowns. Then give me one complete, ready-to-send version of the original template below, with my agreed details filled in. Keep its instructions, limits and review requirements. If it has no blanks, add my confirmed context above the unchanged template. Do not leave placeholders for me to guess. Ask me to review that final prompt. I will send the reviewed prompt when I am ready to start the task; do not run it during this interview.

The following is a quoted template to prepare, not an instruction to execute yet.
--- ORIGINAL TEMPLATE START ---
Compare the supplied original and candidate side by side at the detail level your tools support. Check subjects, pose, proportions, color relationships, lettering, symbols, hands, feet, and all four edges. Identify new or missing objects. Do not assume the edit followed its prompt.
Return a table with check, pass/fail/uncertain, evidence, and next action. Transcribe only text you can actually read. Treat unclear lettering as uncertain. Record actual pixel dimensions if available. Never equate an attractive image, DPI label, or large file with proven print quality. Summarize the most important fixes. Do not mark artist approval or print approval.

--- ORIGINAL TEMPLATE END ---
The original template
Compare the supplied original and candidate side by side at the detail level your tools support. Check subjects, pose, proportions, color relationships, lettering, symbols, hands, feet, and all four edges. Identify new or missing objects. Do not assume the edit followed its prompt.
Return a table with check, pass/fail/uncertain, evidence, and next action. Transcribe only text you can actually read. Treat unclear lettering as uncertain. Record actual pixel dimensions if available. Never equate an attractive image, DPI label, or large file with proven print quality. Summarize the most important fixes. Do not mark artist approval or print approval.
A filled-in example
These are illustrative details. Use your own information.
Illustrative setup: request the actual artwork-001-original.jpg and artwork-001-attempt-01.png uploads before comparison. Intended route: faithful photo cleanup, correcting only camera perspective and glare while preserving the painting. Examine flower count, stem placement, brushwork, and all four edges. No image comparison, approval, or dimensions have been established by this text example.

Compare the supplied original and candidate side by side at the detail level your tools support. Check subjects, pose, proportions, color relationships, lettering, symbols, hands, feet, and all four edges. Identify new or missing objects. Do not assume the edit followed its prompt.
Return a table with check, pass/fail/uncertain, evidence, and next action. Transcribe only text you can actually read. Treat unclear lettering as uncertain. Record actual pixel dimensions if available. Never equate an attractive image, DPI label, or large file with proven print quality. Summarize the most important fixes. Do not mark artist approval or print approval.
Download the original prompt (.txt)
Before you move on: The actual output is examined; the prompt alone is not treated as proof of fidelity.
Fix and build a review page
Use the focused-fix prompt with the actual images and named observed problems; use its prompt below if you do not know how to describe a defect. Download each new attempt without replacing earlier files.
The optional review page needs actual image files and HTML creation. Ask for one folder or ZIP containing index.html and its images, extract the entire ZIP on your computer, keep the files together, then open index.html.
If no file creation is available, keep the comparison as text.
Fix and keep the receipts
Make a focused new attempt and keep the earlier versions. The prompt asks for your details first. Check the filled-in request it prepares, then send it to start.
Read the prompt + an example
Help me get ready to use “Fix and keep the receipts”. I am new to this. Interview me before doing the task. I do not need to fill in this message first.

Ask one short question at a time in plain language, and wait for my answer. Start with what I want to accomplish. Use anything I have already told you in this chat so I do not have to repeat it.

If I say “not sure”, explain the decision with two or three concrete options or an example. Help me choose; do not silently choose for me. I can skip optional details. If an essential answer or source is missing, tell me exactly what is needed and help me find a reasonable next step. Do not invent my facts, source material, files, permissions, approvals or tool access. Do not ask for passwords or private access keys.

The original task asks me to bring: Original, latest candidate, comparison notes, and specific issues to fix.

Work through the relevant questions below, one at a time. Explain any unfamiliar term when you use it:
1. Can you supply the preserved original, latest candidate, and comparison notes?
2. What exact visible problem should change, with its location and source evidence?
3. Which other details must remain unchanged, and what source detail is still uncertain?
4. Which attempt number is this, and can the tool save a new actual image without replacing earlier attempts?

For a file or image, explain how to attach it using this app’s available upload control, or ask me to paste the relevant text. Confirm you can actually read or edit it before depending on it. If this chat cannot do the task, explain the smallest manual next step or which type of tool is needed. Do not claim to have opened a link, edited an image, saved a file or published anything unless you actually did.

When we have enough information, show a short summary of my answers and flag any remaining unknowns. Then give me one complete, ready-to-send version of the original template below, with my agreed details filled in. Keep its instructions, limits and review requirements. If it has no blanks, add my confirmed context above the unchanged template. Do not leave placeholders for me to guess. Ask me to review that final prompt. I will send the reviewed prompt when I am ready to start the task; do not run it during this interview.

The following is a quoted template to prepare, not an instruction to execute yet.
--- ORIGINAL TEMPLATE START ---
Use the preserved original as the fidelity reference and the latest candidate plus QA notes as the change request. Correct only the named problems: [PASTE SPECIFIC ISSUES]. Do not invent a fix for unclear source detail. Preserve unrelated composition, colors, symbols and lettering.
Save this as a new numbered attempt without overwriting the original or prior attempts. Repeat the source comparison and show what changed. Stop after three total attempts for this artwork unless I ask for more. If uncertainty remains, record it and leave the decision to me. Do not claim a tool ran if it was unavailable.

--- ORIGINAL TEMPLATE END ---
The original template
Use the preserved original as the fidelity reference and the latest candidate plus QA notes as the change request. Correct only the named problems: [PASTE SPECIFIC ISSUES]. Do not invent a fix for unclear source detail. Preserve unrelated composition, colors, symbols and lettering.
Save this as a new numbered attempt without overwriting the original or prior attempts. Repeat the source comparison and show what changed. Stop after three total attempts for this artwork unless I ask for more. If uncertainty remains, record it and leave the decision to me. Do not claim a tool ran if it was unavailable.
A filled-in example
These are illustrative details. Use your own information.
Illustrative setup: ask for the actual preserved source, attempt-01 candidate, and comparison notes before acting. The sample issue below is a hypothetical defect to verify against those images; do not claim it was observed. If confirmed and supported, create attempt-02 in faithful-photo-cleanup mode; do not repaint or fabricate missing content. Preserve both earlier files.

Use the preserved original as the fidelity reference and the latest candidate plus QA notes as the change request. Correct only the named problems: if the actual comparison confirms it, restore the visible upper-left flower tip that was cropped out of attempt-01; use only the shape visible in the preserved source, keep the other flowers and stems unchanged, and leave any genuinely missing shape unresolved. Do not invent a fix for unclear source detail. Preserve unrelated composition, colors, symbols and lettering.
Save this as a new numbered attempt without overwriting the original or prior attempts. Repeat the source comparison and show what changed. Stop after three total attempts for this artwork unless I ask for more. If uncertainty remains, record it and leave the decision to me. Do not claim a tool ran if it was unavailable.
Download the original prompt (.txt)
Build the review page
Show actual saved files, every attempt, open issues, and review status. The prompt asks for your details first. Check the filled-in request it prepares, then send it to start.
Read the prompt + an example
Help me get ready to use “Build the review page”. I am new to this. Interview me before doing the task. I do not need to fill in this message first.

Ask one short question at a time in plain language, and wait for my answer. Start with what I want to accomplish. Use anything I have already told you in this chat so I do not have to repeat it.

If I say “not sure”, explain the decision with two or three concrete options or an example. Help me choose; do not silently choose for me. I can skip optional details. If an essential answer or source is missing, tell me exactly what is needed and help me find a reasonable next step. Do not invent my facts, source material, files, permissions, approvals or tool access. Do not ask for passwords or private access keys.

The original task asks me to bring: Actual local source and attempt files, QA notes, and an environment that can create HTML.

Work through the relevant questions below, one at a time. Explain any unfamiliar term when you use it:
1. What actual original and attempt files can the assistant access now, and what filenames do they really have?
2. What comparison notes and unresolved questions should be shown, with approvals left to you?
3. Can this environment create HTML and include the real image files in a downloadable folder or ZIP?
4. Where will you save and extract the complete folder so the page and its relative image links remain together?

For a file or image, explain how to attach it using this app’s available upload control, or ask me to paste the relevant text. Confirm you can actually read or edit it before depending on it. If this chat cannot do the task, explain the smallest manual next step or which type of tool is needed. Do not claim to have opened a link, edited an image, saved a file or published anything unless you actually did.

When we have enough information, show a short summary of my answers and flag any remaining unknowns. Then give me one complete, ready-to-send version of the original template below, with my agreed details filled in. Keep its instructions, limits and review requirements. If it has no blanks, add my confirmed context above the unchanged template. Do not leave placeholders for me to guess. Ask me to review that final prompt. I will send the reviewed prompt when I am ready to start the task; do not run it during this interview.

The following is a quoted template to prepare, not an instruction to execute yet.
--- ORIGINAL TEMPLATE START ---
Build a local HTML review page using the files actually available in this project. For each artwork, show its ID, original photo, every numbered attempt, comparison notes, pass/fail/uncertain results and next action. Keep failed attempts visible. Use relative image paths and captions. Check that every referenced file exists. Distinguish technical QA from artist approval and print approval. Never invent QA results or approvals. If files or tooling are missing, list them and create only what you can verify. Include links to the original and each full-size attempt.

--- ORIGINAL TEMPLATE END ---
The original template
Build a local HTML review page using the files actually available in this project. For each artwork, show its ID, original photo, every numbered attempt, comparison notes, pass/fail/uncertain results and next action. Keep failed attempts visible. Use relative image paths and captions. Check that every referenced file exists. Distinguish technical QA from artist approval and print approval. Never invent QA results or approvals. If files or tooling are missing, list them and create only what you can verify. Include links to the original and each full-size attempt.
A filled-in example
These are illustrative details. Use your own information.
Illustrative setup: I want one local review page for artwork-001. Ask me to supply the actual files artwork-001-original.jpg and artwork-001-attempt-01.png plus real comparison notes. Their existence is not established by this sample text. No artist or print approval is supplied. If HTML creation is supported, put index.html and the actual images in one downloadable folder or ZIP, use their real filenames, and check the links. Explain that I must download it, extract the whole ZIP, keep images beside the page, then open index.html. If tooling is unavailable, return a text review instead and name that limitation.

Build a local HTML review page using the files actually available in this project. For each artwork, show its ID, original photo, every numbered attempt, comparison notes, pass/fail/uncertain results and next action. Keep failed attempts visible. Use relative image paths and captions. Check that every referenced file exists. Distinguish technical QA from artist approval and print approval. Never invent QA results or approvals. If files or tooling are missing, list them and create only what you can verify. Include links to the original and each full-size attempt.
Download the original prompt (.txt)
Before you move on: Artist approval and print approval remain separate from technical checks.
Check it. Save the useful version.
Open the actual result and use it as the reader would.
Download the actual image from the chat’s image or download control, then open it. Save it as artwork-001-attempt-01, keeping its real file extension; keep the source as artwork-001-original. Save each later attempt separately. Copy comparison notes into a document beside the images; do not overwrite the source.
If you get stuck
You want photo cleanup but the master prompt repaints.
Do not use the repaint master prompt for faithful cleanup. Choose the cleanup route and a suitable non-generative method or explicitly agreed edit brief.
The output looks better but changes symbols or lettering.
Mark the comparison failed or uncertain and request a focused correction using the preserved source.
The prompt requested a large print size.
Inspect actual pixel dimensions and production requirements. Do not treat the request as proof of print readiness.
The assistant says there is a review page but no file.
Ask for the actual saved file and verify its image references, or retain a clearly labeled text-only review if file creation was unavailable.
Historical repainting reference
This optional brief asks for a new repaint and can change painted details. Use the main steps above for faithful photo cleanup.
Original restoration master prompt
The complete, unchanged historical art brief. It asks for a generative repaint. The prompt asks for your details first. Check the filled-in request it prepares, then send it to start.
Read the prompt + an example
Help me get ready to use “Original restoration master prompt”. I am new to this. Interview me before doing the task. I do not need to fill in this message first.

Ask one short question at a time in plain language, and wait for my answer. Start with what I want to accomplish. Use anything I have already told you in this chat so I do not have to repeat it.

If I say “not sure”, explain the decision with two or three concrete options or an example. Help me choose; do not silently choose for me. I can skip optional details. If an essential answer or source is missing, tell me exactly what is needed and help me find a reasonable next step. Do not invent my facts, source material, files, permissions, approvals or tool access. Do not ask for passwords or private access keys.

The original task asks me to bring: One artwork source image and an explicit choice of AI-assisted repainting; a supported authorized image tool.

Work through the relevant questions below, one at a time. Explain any unfamiliar term when you use it:
1. Which artwork photo are you authorized to use, and can you upload the actual image?
2. Do you explicitly want an AI-assisted repaint? This historical prompt repaints and completes details; faithful photo cleanup uses a different brief.
3. Which visible features and uncertain details should stay unchanged, and what must not be invented?
4. Can this tool actually create images, and will you review the real output rather than assume the requested print size was produced?

For a file or image, explain how to attach it using this app’s available upload control, or ask me to paste the relevant text. Confirm you can actually read or edit it before depending on it. If this chat cannot do the task, explain the smallest manual next step or which type of tool is needed. Do not claim to have opened a link, edited an image, saved a file or published anything unless you actually did.

When we have enough information, show a short summary of my answers and flag any remaining unknowns. Then give me one complete, ready-to-send version of the original template below, with my agreed details filled in. Keep its instructions, limits and review requirements. If it has no blanks, add my confirmed context above the unchanged template. Do not leave placeholders for me to guess. Ask me to review that final prompt. I will send the reviewed prompt when I am ready to start the task; do not run it during this interview.

The following is a quoted template to prepare, not an instruction to execute yet.
--- ORIGINAL TEMPLATE START ---
MASTER PROMPT — PAINTING RESTORATION + PRINT-READY RECOMPOSITION

INPUT:
You are given one original hand-painted artwork.

GOAL:
Repaint and complete this exact artwork as a premium, high-resolution fine-art print while preserving the original artist's composition, visual language, colors, symbols, cultural character, and handmade painting style.

This is NOT a redesign.
This is NOT an illustration inspired by the painting.
This is NOT an opportunity to add more decoration.

Imagine that the original artist has returned to the studio, placed a fresh larger canvas on the easel, and carefully repainted the same work so that it is complete, beautifully balanced, uncropped, freshly painted, and suitable for a museum-quality wall print.

--------------------------------------------------
STEP 1 — ANALYZE THE ORIGINAL BEFORE PAINTING
--------------------------------------------------

First inspect the source artwork.

Determine:

1. the principal subject or subjects;
2. the intended composition;
3. which objects are intentionally cropped versus accidentally cropped by the photograph/canvas;
4. the dominant background color and physical paint texture;
5. whether the artwork naturally wants to be:
   - PORTRAIT,
   - LANDSCAPE,
   - or SQUARE.

Choose the format based on the artwork itself.

Do NOT select the orientation merely from the source image's pixel dimensions.

Consider the actual visual composition.

The artwork determines the format.
The format does not determine the artwork.

Do not output this analysis.
Use it internally to create the final painting.

--------------------------------------------------
STEP 2 — CHOOSE THE CORRECT PRINT COMPOSITION
--------------------------------------------------

Preferred formats:

PORTRAIT
2:3 aspect ratio
24 × 36 inch master

LANDSCAPE
3:2 aspect ratio
36 × 24 inch master

SQUARE
1:1 aspect ratio
Use only when the composition is genuinely square and converting it to 2:3 or 3:2 would weaken or substantially alter the original artwork.

Prefer portrait or landscape for the main poster collection when either works naturally.

Never rotate an artwork simply to make it fit another orientation.

Never stretch the artwork.

Never distort proportions.

Never crop important artwork merely to achieve an aspect ratio.

--------------------------------------------------
STEP 3 — PRESERVE THE ORIGINAL PAINTING
--------------------------------------------------

Treat the uploaded painting as the authoritative source.

Preserve as faithfully as possible:

- principal subject
- pose
- body position
- body proportions
- facial profile
- facial expression
- gestures
- hands
- feet
- clothing
- ceremonial garments
- headdress
- feathers
- jewelry
- shields
- weapons
- vessels
- staffs
- plants
- animals
- glyphs
- symbols
- geometric forms
- decorative objects
- relative scale
- spatial relationships
- visual rhythm
- original black contour work
- original palette
- composition
- direction of movement
- handmade irregularities that give the painting character

The finished image must remain immediately recognizable as the SAME PAINTING.

Do not replace ambiguous forms with new inventions.

If a symbol or small detail is unclear in the source, preserve its visible shape and visual character rather than hallucinating a culturally specific symbol.

--------------------------------------------------
STEP 4 — DO NOT ADD NEW ARTWORK
--------------------------------------------------

This instruction is critical.

Do NOT invent additional:

- borders
- frames
- glyphs
- animals
- feathers
- plants
- flowers
- suns
- moons
- jewelry
- headdresses
- architectural elements
- geometric patterns
- ceremonial objects
- decorative motifs
- symbols
- writing
- pseudo-Aztec symbols
- pseudo-Mayan symbols
- filler ornamentation

Do not make the image "richer" by adding more objects.

Richness must come from PAINT QUALITY, COLOR, TEXTURE, and CRAFT — not additional design.

Do not modernize the iconography.

Do not turn the work into generic fantasy Mesoamerican art.

Do not introduce visual material merely because it appears historically or culturally plausible.

--------------------------------------------------
STEP 5 — REPAINT, DO NOT SIMPLY UPSCALE
--------------------------------------------------

Reconstruct the artwork as if it were physically repainted by hand at a larger scale.

The final result should look like real pigment applied to a physical painted surface.

Preserve:

- visible brush strokes
- layered pigment
- natural variation in paint thickness
- subtle texture
- imperfect handmade edges
- slightly irregular black contour lines
- physical paint transitions
- areas where brush direction can be seen
- natural variation within large color fields

Improve:

- paint coverage
- color richness
- tonal depth
- edge clarity
- pigment density
- texture
- visual cleanliness
- overall finish

The artwork should look freshly painted rather than digitally restored.

Avoid:

- vector-perfect geometry
- sterile outlines
- perfectly uniform fills
- artificial gradients
- airbrushing
- glossy CGI
- 3D rendering
- photographic realism
- plastic surfaces
- generic AI illustration styling
- digital watercolor effects
- fake canvas filters
- excessive sharpening
- smooth synthetic backgrounds

The physicality of the paint should remain visible.

--------------------------------------------------
STEP 6 — COMPLETE ACCIDENTALLY CROPPED AREAS
--------------------------------------------------

If the original source was photographed or painted too tightly, gently complete the composition.

Important artwork should NOT appear accidentally chopped off by the final canvas.

Protect:

- heads
- headdresses
- feather tips
- hands
- feet
- clothing
- tails
- principal animals
- ceremonial objects
- major glyphs
- significant ornaments

If additional space is needed, make the overall composition slightly smaller within the canvas rather than cropping the artwork.

Do not radically reposition individual elements.

Preserve their relationships.

Some secondary objects may intentionally leave the frame when this is clearly part of the original composition.

Do not automatically "fix" an intentional crop.

--------------------------------------------------
STEP 7 — CREATE NATURAL BREATHING ROOM
--------------------------------------------------

Give the finished painting enough surrounding space that the artwork feels deliberately composed for the final canvas.

For a 24 × 36 or 36 × 24 print, maintain approximately ONE INCH of visual breathing room between important artwork and the final trim edge whenever practical.

That means the principal artwork should not appear jammed against:

- top edge
- bottom edge
- left edge
- right edge

Pay special attention to long feathers, headdresses, hands, feet, tails, plants, and objects extending from the central figure.

Every side matters equally.

Do not create a large margin on one side while allowing another important element to touch the opposite edge.

--------------------------------------------------
STEP 8 — PAINT THE BACKGROUND ALL THE WAY TO THE EDGE
--------------------------------------------------

There must be PAINT all the way to every edge of the final canvas.

NO blank padding.

NO white margins.

NO artificial digital borders.

NO plain solid-color extension.

NO frame.

NO matting.

When additional canvas is required, extend the existing painted background naturally.

Example:

If the original has a blue painted background, continue that blue paint outward.

The extension must contain authentic-looking variations in:

- brush direction
- pigment density
- hue
- tone
- visible strokes
- overlapping paint marks

The extended area must look like the same artist physically continued painting the canvas.

It should be impossible to visually identify where the original background ended and the newly completed area began.

Do not merely sample one background color and fill the extra area digitally.

PAINT it.

--------------------------------------------------
STEP 9 — COLOR
--------------------------------------------------

Preserve the source painting's actual palette.

Do not recolor the work.

Maintain the original relationships among colors.

Where present, preserve colors such as:

- cobalt blue
- turquoise
- teal
- green
- deep red
- crimson
- orange
- ochre
- golden yellow
- cream
- white
- burgundy
- brown
- black

Restore dull photographed pigment only enough to make it resemble fresh physical paint.

Colors may become cleaner, richer, and more luminous, but they must still feel like the SAME pigments used by the artist.

Do not introduce trendy contemporary colors.

Do not shift the entire palette.

--------------------------------------------------
STEP 10 — CULTURAL AND VISUAL FIDELITY
--------------------------------------------------

Preserve the cultural visual language already present in the painting.

Do not "correct" the artwork using assumptions about historical Mesoamerican art.

Do not redesign the work to resemble museum artifacts, codices, archaeological reconstructions, or another artist's work.

Do not create fake historical accuracy.

This is preservation and refinement of THIS ARTIST'S painting.

When uncertain, fidelity to the source is more important than adding culturally plausible detail.

--------------------------------------------------
STEP 11 — CLEAN UP ONLY WHAT SHOULD BE CLEANED UP
--------------------------------------------------

Remove accidental photographic problems where present:

- glare
- camera distortion
- perspective distortion
- uneven lighting
- compression artifacts
- accidental blur
- dust
- obvious photographic color casts
- unwanted wall/background outside the painting

Present the final artwork perfectly straight-on.

Do not remove intentional handmade imperfections.

Do not make the painting sterile.

--------------------------------------------------
STEP 12 — FINAL VISUAL STANDARD
--------------------------------------------------

The final result should feel like:

The original artist created a new, larger version of the same painting on a fresh canvas.

They preserved their original drawing and imagery.

They gave the composition enough room to breathe.

They completed areas that had previously been constrained by the old canvas.

They continued the painted background naturally to all four edges.

They refreshed the pigment.

They strengthened the paint texture.

They preserved their handmade brushwork.

They did NOT redesign the artwork.

The result should feel:

- complete
- intentional
- balanced
- richly painted
- handmade
- tactile
- saturated
- refined
- gallery-worthy
- suitable for a premium art print

--------------------------------------------------
STEP 13 — PRODUCTION SAFETY AREA
--------------------------------------------------

Important visual elements should remain approximately one inch inside the final trim edge whenever possible.

For a final 300 DPI print master:

1 inch = 300 pixels.

Therefore the eventual production master should ideally maintain approximately:

300 px safe visual space:
- top
- bottom
- left
- right

This area is NOT a border.

It must consist of naturally continued PAINTED BACKGROUND.

The painting itself continues all the way through the safety area and to the final physical edge.

--------------------------------------------------
STEP 14 — OUTPUT
--------------------------------------------------

Generate ONLY the completed artwork.

No frame.
No wall mockup.
No room.
No poster mockup.
No matting.
No gallery scene.
No title.
No caption.
No signature added.
No watermark.
No typography.
No external border.

The output must be a clean image of the finished painting itself.

--------------------------------------------------
FINAL PRIORITY ORDER
--------------------------------------------------

When instructions compete, follow this priority:

1. Preserve the original artwork.
2. Preserve the original composition and cultural imagery.
3. Prevent important elements from being accidentally cropped.
4. Choose the orientation that naturally fits the work.
5. Give important artwork balanced breathing room on ALL sides.
6. Continue the existing painted background to every edge.
7. Improve physical paint quality and texture.
8. Preserve the original colors.
9. Avoid inventing new visual information.
10. Prepare a beautiful, balanced composition suitable for a fine-art print.

FINAL TEST:

Before finishing, visually inspect all four edges.

Ask:

Is anything important accidentally touching an edge?

Does the artwork have reasonably balanced breathing room on the top, bottom, left AND right?

Does the background look physically painted all the way to every edge?

Did I add anything that wasn't actually needed?

Does this still look unmistakably like the original artist's painting?

If any answer is wrong, correct it before producing the final artwork.


--- ORIGINAL TEMPLATE END ---
The original template
MASTER PROMPT — PAINTING RESTORATION + PRINT-READY RECOMPOSITION

INPUT:
You are given one original hand-painted artwork.

GOAL:
Repaint and complete this exact artwork as a premium, high-resolution fine-art print while preserving the original artist's composition, visual language, colors, symbols, cultural character, and handmade painting style.

This is NOT a redesign.
This is NOT an illustration inspired by the painting.
This is NOT an opportunity to add more decoration.

Imagine that the original artist has returned to the studio, placed a fresh larger canvas on the easel, and carefully repainted the same work so that it is complete, beautifully balanced, uncropped, freshly painted, and suitable for a museum-quality wall print.

--------------------------------------------------
STEP 1 — ANALYZE THE ORIGINAL BEFORE PAINTING
--------------------------------------------------

First inspect the source artwork.

Determine:

1. the principal subject or subjects;
2. the intended composition;
3. which objects are intentionally cropped versus accidentally cropped by the photograph/canvas;
4. the dominant background color and physical paint texture;
5. whether the artwork naturally wants to be:
   - PORTRAIT,
   - LANDSCAPE,
   - or SQUARE.

Choose the format based on the artwork itself.

Do NOT select the orientation merely from the source image's pixel dimensions.

Consider the actual visual composition.

The artwork determines the format.
The format does not determine the artwork.

Do not output this analysis.
Use it internally to create the final painting.

--------------------------------------------------
STEP 2 — CHOOSE THE CORRECT PRINT COMPOSITION
--------------------------------------------------

Preferred formats:

PORTRAIT
2:3 aspect ratio
24 × 36 inch master

LANDSCAPE
3:2 aspect ratio
36 × 24 inch master

SQUARE
1:1 aspect ratio
Use only when the composition is genuinely square and converting it to 2:3 or 3:2 would weaken or substantially alter the original artwork.

Prefer portrait or landscape for the main poster collection when either works naturally.

Never rotate an artwork simply to make it fit another orientation.

Never stretch the artwork.

Never distort proportions.

Never crop important artwork merely to achieve an aspect ratio.

--------------------------------------------------
STEP 3 — PRESERVE THE ORIGINAL PAINTING
--------------------------------------------------

Treat the uploaded painting as the authoritative source.

Preserve as faithfully as possible:

- principal subject
- pose
- body position
- body proportions
- facial profile
- facial expression
- gestures
- hands
- feet
- clothing
- ceremonial garments
- headdress
- feathers
- jewelry
- shields
- weapons
- vessels
- staffs
- plants
- animals
- glyphs
- symbols
- geometric forms
- decorative objects
- relative scale
- spatial relationships
- visual rhythm
- original black contour work
- original palette
- composition
- direction of movement
- handmade irregularities that give the painting character

The finished image must remain immediately recognizable as the SAME PAINTING.

Do not replace ambiguous forms with new inventions.

If a symbol or small detail is unclear in the source, preserve its visible shape and visual character rather than hallucinating a culturally specific symbol.

--------------------------------------------------
STEP 4 — DO NOT ADD NEW ARTWORK
--------------------------------------------------

This instruction is critical.

Do NOT invent additional:

- borders
- frames
- glyphs
- animals
- feathers
- plants
- flowers
- suns
- moons
- jewelry
- headdresses
- architectural elements
- geometric patterns
- ceremonial objects
- decorative motifs
- symbols
- writing
- pseudo-Aztec symbols
- pseudo-Mayan symbols
- filler ornamentation

Do not make the image "richer" by adding more objects.

Richness must come from PAINT QUALITY, COLOR, TEXTURE, and CRAFT — not additional design.

Do not modernize the iconography.

Do not turn the work into generic fantasy Mesoamerican art.

Do not introduce visual material merely because it appears historically or culturally plausible.

--------------------------------------------------
STEP 5 — REPAINT, DO NOT SIMPLY UPSCALE
--------------------------------------------------

Reconstruct the artwork as if it were physically repainted by hand at a larger scale.

The final result should look like real pigment applied to a physical painted surface.

Preserve:

- visible brush strokes
- layered pigment
- natural variation in paint thickness
- subtle texture
- imperfect handmade edges
- slightly irregular black contour lines
- physical paint transitions
- areas where brush direction can be seen
- natural variation within large color fields

Improve:

- paint coverage
- color richness
- tonal depth
- edge clarity
- pigment density
- texture
- visual cleanliness
- overall finish

The artwork should look freshly painted rather than digitally restored.

Avoid:

- vector-perfect geometry
- sterile outlines
- perfectly uniform fills
- artificial gradients
- airbrushing
- glossy CGI
- 3D rendering
- photographic realism
- plastic surfaces
- generic AI illustration styling
- digital watercolor effects
- fake canvas filters
- excessive sharpening
- smooth synthetic backgrounds

The physicality of the paint should remain visible.

--------------------------------------------------
STEP 6 — COMPLETE ACCIDENTALLY CROPPED AREAS
--------------------------------------------------

If the original source was photographed or painted too tightly, gently complete the composition.

Important artwork should NOT appear accidentally chopped off by the final canvas.

Protect:

- heads
- headdresses
- feather tips
- hands
- feet
- clothing
- tails
- principal animals
- ceremonial objects
- major glyphs
- significant ornaments

If additional space is needed, make the overall composition slightly smaller within the canvas rather than cropping the artwork.

Do not radically reposition individual elements.

Preserve their relationships.

Some secondary objects may intentionally leave the frame when this is clearly part of the original composition.

Do not automatically "fix" an intentional crop.

--------------------------------------------------
STEP 7 — CREATE NATURAL BREATHING ROOM
--------------------------------------------------

Give the finished painting enough surrounding space that the artwork feels deliberately composed for the final canvas.

For a 24 × 36 or 36 × 24 print, maintain approximately ONE INCH of visual breathing room between important artwork and the final trim edge whenever practical.

That means the principal artwork should not appear jammed against:

- top edge
- bottom edge
- left edge
- right edge

Pay special attention to long feathers, headdresses, hands, feet, tails, plants, and objects extending from the central figure.

Every side matters equally.

Do not create a large margin on one side while allowing another important element to touch the opposite edge.

--------------------------------------------------
STEP 8 — PAINT THE BACKGROUND ALL THE WAY TO THE EDGE
--------------------------------------------------

There must be PAINT all the way to every edge of the final canvas.

NO blank padding.

NO white margins.

NO artificial digital borders.

NO plain solid-color extension.

NO frame.

NO matting.

When additional canvas is required, extend the existing painted background naturally.

Example:

If the original has a blue painted background, continue that blue paint outward.

The extension must contain authentic-looking variations in:

- brush direction
- pigment density
- hue
- tone
- visible strokes
- overlapping paint marks

The extended area must look like the same artist physically continued painting the canvas.

It should be impossible to visually identify where the original background ended and the newly completed area began.

Do not merely sample one background color and fill the extra area digitally.

PAINT it.

--------------------------------------------------
STEP 9 — COLOR
--------------------------------------------------

Preserve the source painting's actual palette.

Do not recolor the work.

Maintain the original relationships among colors.

Where present, preserve colors such as:

- cobalt blue
- turquoise
- teal
- green
- deep red
- crimson
- orange
- ochre
- golden yellow
- cream
- white
- burgundy
- brown
- black

Restore dull photographed pigment only enough to make it resemble fresh physical paint.

Colors may become cleaner, richer, and more luminous, but they must still feel like the SAME pigments used by the artist.

Do not introduce trendy contemporary colors.

Do not shift the entire palette.

--------------------------------------------------
STEP 10 — CULTURAL AND VISUAL FIDELITY
--------------------------------------------------

Preserve the cultural visual language already present in the painting.

Do not "correct" the artwork using assumptions about historical Mesoamerican art.

Do not redesign the work to resemble museum artifacts, codices, archaeological reconstructions, or another artist's work.

Do not create fake historical accuracy.

This is preservation and refinement of THIS ARTIST'S painting.

When uncertain, fidelity to the source is more important than adding culturally plausible detail.

--------------------------------------------------
STEP 11 — CLEAN UP ONLY WHAT SHOULD BE CLEANED UP
--------------------------------------------------

Remove accidental photographic problems where present:

- glare
- camera distortion
- perspective distortion
- uneven lighting
- compression artifacts
- accidental blur
- dust
- obvious photographic color casts
- unwanted wall/background outside the painting

Present the final artwork perfectly straight-on.

Do not remove intentional handmade imperfections.

Do not make the painting sterile.

--------------------------------------------------
STEP 12 — FINAL VISUAL STANDARD
--------------------------------------------------

The final result should feel like:

The original artist created a new, larger version of the same painting on a fresh canvas.

They preserved their original drawing and imagery.

They gave the composition enough room to breathe.

They completed areas that had previously been constrained by the old canvas.

They continued the painted background naturally to all four edges.

They refreshed the pigment.

They strengthened the paint texture.

They preserved their handmade brushwork.

They did NOT redesign the artwork.

The result should feel:

- complete
- intentional
- balanced
- richly painted
- handmade
- tactile
- saturated
- refined
- gallery-worthy
- suitable for a premium art print

--------------------------------------------------
STEP 13 — PRODUCTION SAFETY AREA
--------------------------------------------------

Important visual elements should remain approximately one inch inside the final trim edge whenever possible.

For a final 300 DPI print master:

1 inch = 300 pixels.

Therefore the eventual production master should ideally maintain approximately:

300 px safe visual space:
- top
- bottom
- left
- right

This area is NOT a border.

It must consist of naturally continued PAINTED BACKGROUND.

The painting itself continues all the way through the safety area and to the final physical edge.

--------------------------------------------------
STEP 14 — OUTPUT
--------------------------------------------------

Generate ONLY the completed artwork.

No frame.
No wall mockup.
No room.
No poster mockup.
No matting.
No gallery scene.
No title.
No caption.
No signature added.
No watermark.
No typography.
No external border.

The output must be a clean image of the finished painting itself.

--------------------------------------------------
FINAL PRIORITY ORDER
--------------------------------------------------

When instructions compete, follow this priority:

1. Preserve the original artwork.
2. Preserve the original composition and cultural imagery.
3. Prevent important elements from being accidentally cropped.
4. Choose the orientation that naturally fits the work.
5. Give important artwork balanced breathing room on ALL sides.
6. Continue the existing painted background to every edge.
7. Improve physical paint quality and texture.
8. Preserve the original colors.
9. Avoid inventing new visual information.
10. Prepare a beautiful, balanced composition suitable for a fine-art print.

FINAL TEST:

Before finishing, visually inspect all four edges.

Ask:

Is anything important accidentally touching an edge?

Does the artwork have reasonably balanced breathing room on the top, bottom, left AND right?

Does the background look physically painted all the way to every edge?

Did I add anything that wasn't actually needed?

Does this still look unmistakably like the original artist's painting?

If any answer is wrong, correct it before producing the final artwork.
A filled-in example
These are illustrative details. Use your own information.
Illustrative setup: I own a small flower painting on blue paper and choose an AI-assisted repaint candidate, understanding that it can change details. Ask me to upload the actual source photo, artwork-001-original.jpg, before image work; this text example contains no image. Keep the flower count and visible stem arrangement; do not guess unclear marks. Use supported image creation only, preserve the source, and return the actual candidate without claiming the requested print dimensions were achieved. I will inspect it and decide whether to accept it. The historical brief follows unchanged.

MASTER PROMPT — PAINTING RESTORATION + PRINT-READY RECOMPOSITION

INPUT:
You are given one original hand-painted artwork.

GOAL:
Repaint and complete this exact artwork as a premium, high-resolution fine-art print while preserving the original artist's composition, visual language, colors, symbols, cultural character, and handmade painting style.

This is NOT a redesign.
This is NOT an illustration inspired by the painting.
This is NOT an opportunity to add more decoration.

Imagine that the original artist has returned to the studio, placed a fresh larger canvas on the easel, and carefully repainted the same work so that it is complete, beautifully balanced, uncropped, freshly painted, and suitable for a museum-quality wall print.

--------------------------------------------------
STEP 1 — ANALYZE THE ORIGINAL BEFORE PAINTING
--------------------------------------------------

First inspect the source artwork.

Determine:

1. the principal subject or subjects;
2. the intended composition;
3. which objects are intentionally cropped versus accidentally cropped by the photograph/canvas;
4. the dominant background color and physical paint texture;
5. whether the artwork naturally wants to be:
   - PORTRAIT,
   - LANDSCAPE,
   - or SQUARE.

Choose the format based on the artwork itself.

Do NOT select the orientation merely from the source image's pixel dimensions.

Consider the actual visual composition.

The artwork determines the format.
The format does not determine the artwork.

Do not output this analysis.
Use it internally to create the final painting.

--------------------------------------------------
STEP 2 — CHOOSE THE CORRECT PRINT COMPOSITION
--------------------------------------------------

Preferred formats:

PORTRAIT
2:3 aspect ratio
24 × 36 inch master

LANDSCAPE
3:2 aspect ratio
36 × 24 inch master

SQUARE
1:1 aspect ratio
Use only when the composition is genuinely square and converting it to 2:3 or 3:2 would weaken or substantially alter the original artwork.

Prefer portrait or landscape for the main poster collection when either works naturally.

Never rotate an artwork simply to make it fit another orientation.

Never stretch the artwork.

Never distort proportions.

Never crop important artwork merely to achieve an aspect ratio.

--------------------------------------------------
STEP 3 — PRESERVE THE ORIGINAL PAINTING
--------------------------------------------------

Treat the uploaded painting as the authoritative source.

Preserve as faithfully as possible:

- principal subject
- pose
- body position
- body proportions
- facial profile
- facial expression
- gestures
- hands
- feet
- clothing
- ceremonial garments
- headdress
- feathers
- jewelry
- shields
- weapons
- vessels
- staffs
- plants
- animals
- glyphs
- symbols
- geometric forms
- decorative objects
- relative scale
- spatial relationships
- visual rhythm
- original black contour work
- original palette
- composition
- direction of movement
- handmade irregularities that give the painting character

The finished image must remain immediately recognizable as the SAME PAINTING.

Do not replace ambiguous forms with new inventions.

If a symbol or small detail is unclear in the source, preserve its visible shape and visual character rather than hallucinating a culturally specific symbol.

--------------------------------------------------
STEP 4 — DO NOT ADD NEW ARTWORK
--------------------------------------------------

This instruction is critical.

Do NOT invent additional:

- borders
- frames
- glyphs
- animals
- feathers
- plants
- flowers
- suns
- moons
- jewelry
- headdresses
- architectural elements
- geometric patterns
- ceremonial objects
- decorative motifs
- symbols
- writing
- pseudo-Aztec symbols
- pseudo-Mayan symbols
- filler ornamentation

Do not make the image "richer" by adding more objects.

Richness must come from PAINT QUALITY, COLOR, TEXTURE, and CRAFT — not additional design.

Do not modernize the iconography.

Do not turn the work into generic fantasy Mesoamerican art.

Do not introduce visual material merely because it appears historically or culturally plausible.

--------------------------------------------------
STEP 5 — REPAINT, DO NOT SIMPLY UPSCALE
--------------------------------------------------

Reconstruct the artwork as if it were physically repainted by hand at a larger scale.

The final result should look like real pigment applied to a physical painted surface.

Preserve:

- visible brush strokes
- layered pigment
- natural variation in paint thickness
- subtle texture
- imperfect handmade edges
- slightly irregular black contour lines
- physical paint transitions
- areas where brush direction can be seen
- natural variation within large color fields

Improve:

- paint coverage
- color richness
- tonal depth
- edge clarity
- pigment density
- texture
- visual cleanliness
- overall finish

The artwork should look freshly painted rather than digitally restored.

Avoid:

- vector-perfect geometry
- sterile outlines
- perfectly uniform fills
- artificial gradients
- airbrushing
- glossy CGI
- 3D rendering
- photographic realism
- plastic surfaces
- generic AI illustration styling
- digital watercolor effects
- fake canvas filters
- excessive sharpening
- smooth synthetic backgrounds

The physicality of the paint should remain visible.

--------------------------------------------------
STEP 6 — COMPLETE ACCIDENTALLY CROPPED AREAS
--------------------------------------------------

If the original source was photographed or painted too tightly, gently complete the composition.

Important artwork should NOT appear accidentally chopped off by the final canvas.

Protect:

- heads
- headdresses
- feather tips
- hands
- feet
- clothing
- tails
- principal animals
- ceremonial objects
- major glyphs
- significant ornaments

If additional space is needed, make the overall composition slightly smaller within the canvas rather than cropping the artwork.

Do not radically reposition individual elements.

Preserve their relationships.

Some secondary objects may intentionally leave the frame when this is clearly part of the original composition.

Do not automatically "fix" an intentional crop.

--------------------------------------------------
STEP 7 — CREATE NATURAL BREATHING ROOM
--------------------------------------------------

Give the finished painting enough surrounding space that the artwork feels deliberately composed for the final canvas.

For a 24 × 36 or 36 × 24 print, maintain approximately ONE INCH of visual breathing room between important artwork and the final trim edge whenever practical.

That means the principal artwork should not appear jammed against:

- top edge
- bottom edge
- left edge
- right edge

Pay special attention to long feathers, headdresses, hands, feet, tails, plants, and objects extending from the central figure.

Every side matters equally.

Do not create a large margin on one side while allowing another important element to touch the opposite edge.

--------------------------------------------------
STEP 8 — PAINT THE BACKGROUND ALL THE WAY TO THE EDGE
--------------------------------------------------

There must be PAINT all the way to every edge of the final canvas.

NO blank padding.

NO white margins.

NO artificial digital borders.

NO plain solid-color extension.

NO frame.

NO matting.

When additional canvas is required, extend the existing painted background naturally.

Example:

If the original has a blue painted background, continue that blue paint outward.

The extension must contain authentic-looking variations in:

- brush direction
- pigment density
- hue
- tone
- visible strokes
- overlapping paint marks

The extended area must look like the same artist physically continued painting the canvas.

It should be impossible to visually identify where the original background ended and the newly completed area began.

Do not merely sample one background color and fill the extra area digitally.

PAINT it.

--------------------------------------------------
STEP 9 — COLOR
--------------------------------------------------

Preserve the source painting's actual palette.

Do not recolor the work.

Maintain the original relationships among colors.

Where present, preserve colors such as:

- cobalt blue
- turquoise
- teal
- green
- deep red
- crimson
- orange
- ochre
- golden yellow
- cream
- white
- burgundy
- brown
- black

Restore dull photographed pigment only enough to make it resemble fresh physical paint.

Colors may become cleaner, richer, and more luminous, but they must still feel like the SAME pigments used by the artist.

Do not introduce trendy contemporary colors.

Do not shift the entire palette.

--------------------------------------------------
STEP 10 — CULTURAL AND VISUAL FIDELITY
--------------------------------------------------

Preserve the cultural visual language already present in the painting.

Do not "correct" the artwork using assumptions about historical Mesoamerican art.

Do not redesign the work to resemble museum artifacts, codices, archaeological reconstructions, or another artist's work.

Do not create fake historical accuracy.

This is preservation and refinement of THIS ARTIST'S painting.

When uncertain, fidelity to the source is more important than adding culturally plausible detail.

--------------------------------------------------
STEP 11 — CLEAN UP ONLY WHAT SHOULD BE CLEANED UP
--------------------------------------------------

Remove accidental photographic problems where present:

- glare
- camera distortion
- perspective distortion
- uneven lighting
- compression artifacts
- accidental blur
- dust
- obvious photographic color casts
- unwanted wall/background outside the painting

Present the final artwork perfectly straight-on.

Do not remove intentional handmade imperfections.

Do not make the painting sterile.

--------------------------------------------------
STEP 12 — FINAL VISUAL STANDARD
--------------------------------------------------

The final result should feel like:

The original artist created a new, larger version of the same painting on a fresh canvas.

They preserved their original drawing and imagery.

They gave the composition enough room to breathe.

They completed areas that had previously been constrained by the old canvas.

They continued the painted background naturally to all four edges.

They refreshed the pigment.

They strengthened the paint texture.

They preserved their handmade brushwork.

They did NOT redesign the artwork.

The result should feel:

- complete
- intentional
- balanced
- richly painted
- handmade
- tactile
- saturated
- refined
- gallery-worthy
- suitable for a premium art print

--------------------------------------------------
STEP 13 — PRODUCTION SAFETY AREA
--------------------------------------------------

Important visual elements should remain approximately one inch inside the final trim edge whenever possible.

For a final 300 DPI print master:

1 inch = 300 pixels.

Therefore the eventual production master should ideally maintain approximately:

300 px safe visual space:
- top
- bottom
- left
- right

This area is NOT a border.

It must consist of naturally continued PAINTED BACKGROUND.

The painting itself continues all the way through the safety area and to the final physical edge.

--------------------------------------------------
STEP 14 — OUTPUT
--------------------------------------------------

Generate ONLY the completed artwork.

No frame.
No wall mockup.
No room.
No poster mockup.
No matting.
No gallery scene.
No title.
No caption.
No signature added.
No watermark.
No typography.
No external border.

The output must be a clean image of the finished painting itself.

--------------------------------------------------
FINAL PRIORITY ORDER
--------------------------------------------------

When instructions compete, follow this priority:

1. Preserve the original artwork.
2. Preserve the original composition and cultural imagery.
3. Prevent important elements from being accidentally cropped.
4. Choose the orientation that naturally fits the work.
5. Give important artwork balanced breathing room on ALL sides.
6. Continue the existing painted background to every edge.
7. Improve physical paint quality and texture.
8. Preserve the original colors.
9. Avoid inventing new visual information.
10. Prepare a beautiful, balanced composition suitable for a fine-art print.

FINAL TEST:

Before finishing, visually inspect all four edges.

Ask:

Is anything important accidentally touching an edge?

Does the artwork have reasonably balanced breathing room on the top, bottom, left AND right?

Does the background look physically painted all the way to every edge?

Did I add anything that wasn't actually needed?

Does this still look unmistakably like the original artist's painting?

If any answer is wrong, correct it before producing the final artwork.
Download the original prompt (.txt)
Keep the useful bits.
Download all prompts and examples (.txt)Download the complete written guide (.md)The full example, sources + extra notes
Illustrative example: one painting with an unclear edge
A source photograph cuts close to a painted detail, and the assistant is tempted to invent the missing shape.
- Inventory the source, flag the edge as uncertain, and choose the editing route.
- Generate or edit only within the agreed brief and save a separate candidate.
- Compare all four edges with the source. Record any invented detail as a failure or uncertainty rather than silently accepting it.
Expected result: a visible candidate and a documented decision, not an unsupported claim that the original was perfectly restored.
SOURCE: the complete original restoration master prompt and six portable adaptations are imported unchanged from the existing Art Photo Rescue prompt source. The supporting usage instructions here are RECOMMENDED ADDITIONS. The worked example is illustrative.
The existing Art Photo Rescue guide contains historical image candidates and their review context. This standalone library does not establish that every prompt, editing route, image model, or print specification has been tested end-to-end. Check actual candidate files and obtain the artist’s decision.
Use “Start here” before image work. Choose the editing mode explicitly, keep the artist’s review separate from technical QA, and do not infer print readiness from a requested size or DPI label. The original prompt’s output specifications are targets, not evidence that a tool produced those pixels.
- Art Photo Rescue original prompt and portable adaptations
SOURCE: the original historical restoration master prompt and six existing portable adaptations are imported unchanged from Art Photo Rescue. Only this library’s supporting usage guidance is a newly written RECOMMENDED ADDITION.
The illustrations explain the process; they are not screenshots of completed work.
WHEN YOU WANT HELP WITH THE NEXT STEP
Want to turn your know-how into something people can buy?
Make your first small digital product and launch it with Molly, one step a day.
December 1–14. Daily videos, three office hours, a private group, and feedback from Molly.
Join the waitlistDoors open Nov 24 for one week. The waitlist gets $47 for the first 48 hours (then $97), and keeps 40+ of my AI agents after the challenge.